PHO 251 Documentary Photography is about creating a series of video and still images that tell a story about people and places. No video experience is necessary. You will have access to full-frame digital cameras but you can also work with traditional film if you prefer.
ROYALTY FREE MUSIC and MEDIA:
Choose Free Lite Account when signing up: https://musopen.org/music/
http://www.openmusicarchive.org/index.php
https://search.creativecommons.org
TUTORIALS:
PREMIERE PRO –
Session 1
Lecture: Introduction and review of syllabus; Discussion and presentation of documentary work.
http://www.filmsshort.com/short-film-pages/conrad-and-the-steamplant-dustin-cohen.html#.WIoXtbYrLGa
Watch Prom by Mary Ellen Mark and Martin Bell
A Beginning – Middle – End – What makes a story?
Homework: Start thinking about what you might want to document.
Session 2
The DSLR as a Video Camera – Bring in your Video capable cameras if you own one.
Frame Rate Vs. Shutter Speed:
https://vimeo.com/blog/post/frame-rate-vs-shutter-speed-setting-the-record-str
Rolling Shutter:
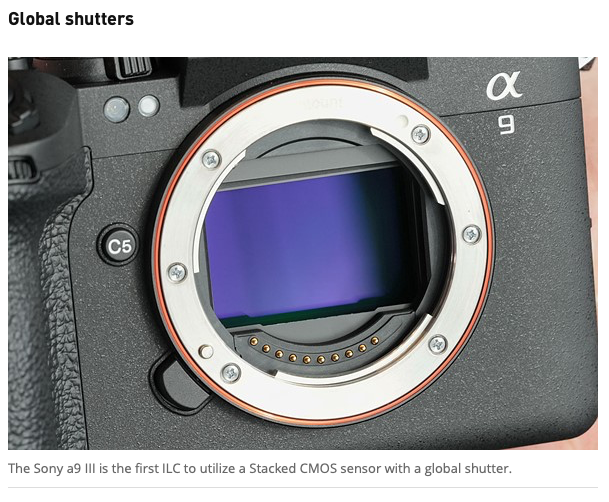
What is global shutter: 3 ways it can change photography: Digital Photography Review (dpreview.com)
Avoid Rolling Shutter:
General guidelines for reducing the rolling shutter effect
- Use a tripod to prevent camera shake and make panning smoother.
- Shoot with the slowest shutter speed you can get away with. The motion blur can mask the rolling shutter effect to some degree.
- Shoot with a (much) higher shutter speed to force the camera in a fast sensor read out mode.
- Use a shorter focal length i.e. more wide angle so you can lower pan speed while covering the same area during panning. To avoid a cut in the screen, you can slowly zoom out when starting the pan and then zooming back in at the end of the pan shot.
- Try to pan in the other direction. Depending on the way your sensor is read out, one direction will work better than the other. Right to left generally works better.
- The fps is not a real variable during shooting (read here) but slower frame rates are more prone to the rolling shutter effect.
If a fast moving foreground is causing the rolling shutter effect
If you are panning with a fast moving subject, try to track the subject more precise. The requires a lot of practice however. You could shoot the scene more than once and pick out the version with the least rolling shutter effect.
An advanced trick for fast action scenes is as follows(2). Test out the amount of skewing that occurs if you record the scene. Now rotate the camera slightly in the opposite direction and record the scene again. With some trial and error you must be able to counteract the effect. The rotated image will make the scene look more dynamic as an added bonus.
If a static background is causing the rolling shutter effect
If you are panning a shot and the background is show a rolling shutter effect, you could try the following.
- Lower pan speed
- Zoom in more on the subject, thus showing less background
- Choose a relatively smooth, simple or empty background
- Use a shallower depth of field (lower aperture number) to throw the background out of focus
Interview Strategies – Empathy, Mirroring, Open Ended Questions, Silence
Create a Practice Interview (in-class)
Watch:
We will practice in class using your own footage. Bring your cameras to shoot a couple of clips. Bring Headphones as well.
Session 3
Continue Premiere Pro Lecture and Editing Techniques
Watch: (download materials if you need some sample pieces)
Bring in HEADPHONES (Standard headphone jacks work on class MacBooks)
Discuss Public/Private spaces
Session 4
Mahalia melts in the rain – https://www.shortoftheweek.com/2021/08/17/mahalia-melts-rain/
Music – Audio
Review Exporting
Take Care by Gillian Laub:
http://mediastorm.com/training/take-care
My Whole World: Martin Bell and Mary Ellen Mark
https://www.youtube.com/watch?v=nF5uZloNNi0
Session 5
Finalize Proposals
Drone Photography
Start a business: Private or LLC?
Event Shooting – Portrait Studio
Pricing/Contracts/Usage/Model Releases
Session 6
Make sure groups have contacts and schedules worked out.
Copyright.gov
Read & Review:
https://lens.blogs.nytimes.com/2017/04/05/controversy-contexts-using-emmett-tills-image/?_r=1
Keywords: Dana Shutz Emmett Till
Compare to Kendall Jenner Pepsi Ad
Sessions 7, 8, 9, 10 Field & Lab Work
You should be using class time to photograph and record for your projects. You may also use the photo lab to begin editing your footage.
I will visit your groups while you are working for assistance or we will meet as a class at the field site.
Session 11
Premiere Pro Review for those who need it
Make Teaser Footage in class (10 seconds of video + music + voice)
– This just needs to give us a sense of what the doc is about
– The music does not need to be the final music selection
Editing – Editing – Editing
Session 12
Photographing and Recording should be done.
Present Intro Teaser Footage
Editing – Editing – Editing
Session 13
Editing – Editing – Editing
Be sure to complete your group collaboration grading.
Session 14 FINAL PRESENTATION
Show your final cut.
Final cut may be presented via external hard drive or uploaded to YouTube or Vimeo (Prof Dalton can also upload a video for you)
You will have to attend open computer lab hours to complete your assignments. Open lab times will be posted.
Bring cameras to every class.
Required Shooting: You must participate in the class documentary shooting during class time and on your own.
Supplies:
External hard drive – Make Sure they are formatted for EXFAT if you also use for a PC.
Heaphones/Headset with 1/8″ plug
You are not required to buy a digital camera to complete this course. There will be some digital (still & video) cameras available for you to borrow from this department and you can scan film.
Assignments will be evaluated according to the Grade Report Key for that Assignment
Semester Grade Breakdown:
25% – Assignments
25% – Midterm Presentation
50% – Final Presentation
Course Student Learning Outcomes (SLO):
Upon successful completion of this course the student will be able to:
- Utilize the video and audio capabilities of a modern digital camera and microphone (ILG 4; PLO 1)
- Explain privacy vs. public concerns when recording (ILG 1; PLO 3)
- Demonstrate editing and sequencing of still and moving images, and audio tracks (ILG 4; PLO 2, 4)
- Evaluate how well a sequence communicates a concept (ILG 11, PLO 4)
- Create, Criticize and Defend Documentary piece in a group setting (ILG 11, PLO 5, 6)
- Understand and evaluate advantages and differences or an LLC and private business
Course-specific Institutional Learning Goals (ILG):
Institutional Learning Goal 1. Written and Oral Communication in English. Students will communicate effectively in both speech and writing.
Institutional Learning Goal 4. Technology. Students will use computer systems or other appropriate forms of technology to achieve educational and personal goals.
Institutional Learning Goal 11. Critical Thinking: Students will use critical thinking skills understand, analyze, or apply information or solve problems.
Program Learning Outcomes for Photography (PLO)
- Demonstrate proficiency with photographic capture devices;
- Process, manipulate, and print images in photographic labs;
- Identify and explain the significant events in art history as well as contemporary practices;
- Integrate different techniques and approaches to photography and digital imaging;
- Analyze and evaluate images in the context of group critiques;
- Create a portfolio for education transfer.
Units of study in detail – Unit Student Learning Outcomes:
Unit I [The Hardware and Software] [Supports Course SLO # 1, 3]
Learning Objectives
The student will be able to:
- Identify and utilize the optimal video settings on a digital camera for the proposed idea
- Utilize Video editing software for proper sequencing and storytelling
- Identify and utilize the proper microphones for audio quality
Unit II [The Business] [Supports Course SLOs # 2, 6]
Learning Objectives
The student will be able to:
- Identify when a model release is necessary or appropriate
- Identify public versus private spaces when photographing
- Describe common misperceptions of fair use rules
- Demonstrate uploading images for copyright protection to copyright.gov
- Identify how to start and the differences and benefits between an LLC and a private business
Unit III [The Documentary] [Supports Course SLOs # 1-5]
Learning Objectives
The student will be able to…
- Research for a long term photographic/Video project
- Negotiate for the rights to photograph people and places
- Edit photographs and video for informational and aesthetic value
- Collaborate with fellow students on final project
Evaluation of student learning:
50% – Assignments/Quizzes
Photo assignments require that you integrate many of the skills and techniques demonstrated in class. The assignment will reinforce technical concepts and require you to investigate what you want to photograph and how you want to treat the subject matter. You will be graded on both technical and creative aspects of your work. Quizzes will test your comprehension of assigned readings and lectures.
50% – Final Presentation
Your final documentary presentation will be assessed for its technical quality, image quality, and storytelling quality.